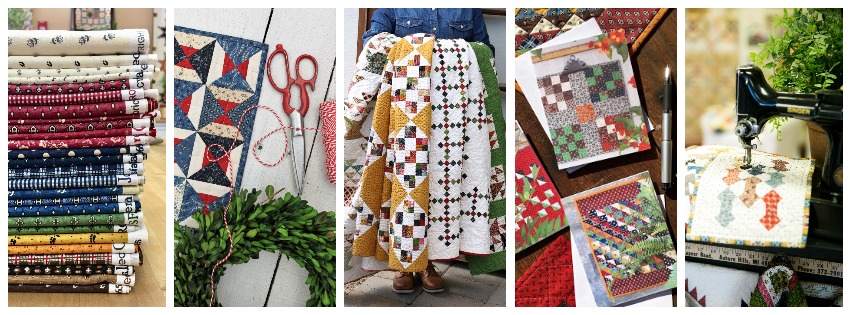
Title

Title

Monday, March 18, 2024

TQC Journal | issue 102

A sweet little sneak peek at a new collection!
Everyday Essentials is arriving in July. 
A dozen little prints will be the perfect
addition to your low volume stash. 
Patchwork Potholder Project - Block Seven
=  =  =  =  =  =  =  =  =
from light pink print, cut:
6 squares, 2" x 2"
2 square, 1-1/2" x 1-1/2"
2 rectangles, 1-1/2" x 2-1/2"
1 square, 5-7/8" x 5-7/8" cut diagonally once
from red print, cut:
6 squares, 2" x 2"
3 squares, 1-7/8" x 1-7/8" cut diagonally once
1 strip cut on bias, 3/4" x 7"

Making the block
1. Using 2" red and light pink squares make half-square-triangles.
Draw a diagonal line on wrong side of light squares.
Place a marked square on a blue and red square, right sides together.
Sew 1/4" from both sides of the drawn line, cut on line and press.
Trim the half-square-triangle unit to 1-1/2" square.

2. Make basket handle using red 3/4" bias strip. Iron under 1/4"
on each long edge or use a bias tape maker. Position strip
to make basket handle on pink triangle. Using an applique
stitch, hand stitch basket handle into place. 

3. Layout block as diagrammed and piece units together,

3. Layer block, batting and back together. Machine or hand 
quilt. Important note - Once your block is quilted trim to 
6-1/2" square. Bind using single thickness binding. 
=  =  =  =  =  =  =  =  =
Catch up on all the Patchwork Potholder Project details here. 

I forgot all about posting Februarys Scrappy Savings
so March brings you double the scrappy fun. Grab one
or both and clean up that overflowing scrap basket. 
- - - - - - - - - - - - - - 
Pinwheel Parade
Finished Quilt 51" x 63"
Scrappy Savings $8.00 $4.00


Timeless Tidbits
Finished Quilt 60" x 75"
Scrappy Savings $8.00 $4.00

Bundle and save even more.
Patchwork Parade and Timeless Tidbits
Scrappy Savings $16.00 $7.00


Monday, March 4, 2024

TQC Journal | issue 101

 
March is here! Grab your favorite green scraps and your
2024 Mini-a-Month Postcard Collection and make this 
simple little mini. It is perfect for a Leprechaun. 

The 2024 Mini-a-Month Postcard Collection is still
available, you can order a set here
 
 Patchwork Potholder Project - Block Six
=  =  =  =  =  =  =  =  =
from light print, cut:
8 squares, 2-3/16" cut diagonally twice

from pink print, cut:
1 square, 1 15/16" 
4 squares, 1/7/8" cut diagonally once

from brown print, cut:
6 squares, 1-7/8" cut diagonally once
1 square, 5-1/4" cut diagonally twice
Making the block
1. Using light, brown and four pink triangles make 12 brown
flying geese and four pink flying geese. 

2. Sew flying geese into strip units as diagrammed. 

3. Layout block diagonal rows using flying geese units, brown
triangles and pink center square. Sew units in rows together.
Join the rows alternating seams at intersections. 

4. Add pink triangles to each corner of block. 

5. Layer block, batting and back together. Machine or hand 
quilt. Important note - Once your block is quilted trim to 
6-1/2" square. Bind using single thickness binding.
=  =  =  =  =  =  =  =  =
Catch up on all the Patchwork Potholder details here. 

Monday, February 19, 2024

TQC Journal | issue 100


Historical Hennas will be arriving soon!

I am taking pre-orders now and hope to start shipping
 as soon as the fabric arrives in March. You can find all the 
details and take a closer look at the projects and bundles here
=  =  =  =  =  =  =  =  =  =  =
Scroll down for more project details
=  =  =  =  =  =  =  =  =  =  =
Just a note | I really appreciate your pre-orders. It really
helps me figure out how much fabric to purchase. I
typically do not order a bunch of extra so place your pre-order
  by Monday, Friday, March  1, so you won't miss out. 
Woven | Historical Hennas
Finished Quilt 57-1/2" x 57-1/2"
=  =  =  =  =  =  =  =  =  =  =
Another fun addition to my Woven Series. This project features
Historical Hennas beautiful deep browns, caramels, tans, cocoa
 browns and greys and is set against a cream background with the
cutest little daisy motif. Add a pop of red for the finishing touch. 

The pieces are small but strip piecing makes it totally doable. 
Kits are available with and without backing.
Check out all the pricing details here.  
Railroad Crossing
Finished Quilt 53" x 64"
=  =  =  =  =  =  =  =  =  =  =
Railroad Crossing features a graphic X block and is set with 
a wonderful red print that is sure to be a favorite. Kit are 
available with and without backing. You can find all the 
pricing details here.  Download the free pattern here
=  =  =  =  =  =  =  =  =  =  =
Don't forget pre-orders are due by Friday, March 1

 Patchwork Potholder Project - Block Five
=  =  =  =  =  =  =  =  =
from light print, cut:
2 squares, 2-1/8" x 2-1/8" cut once diagonally
2 squares 3-3/16" cut twice diagonally

from red print, cut:
2 strips, 1-1/4" x 3"
2 strips, 1-1/4" x 4-1/2"
1 square, 2-1/4" x 2-1/4"
1 square, 3-3/16" x 3-3/16" cut twice diagonally
2 squares, 2-7/8" x 2-7/8" cut once diagonally - corners
Making the Block
1. Using 2-1/4" red square and 2-1/8" light triangles make
center square-in-a-square unit. Sew a triangles to each
side of red square and press. Add triangles to remaining
sides of red square. Trim unit to 3" square. 

2. Add 1-1/4" x 3" red strips to each side of center unit. 
Repeat, adding 1-1/4" x 4-1/2" red strips. 
 
3. Layout two light triangles and one red triangle in a row
alternating the triangles directions. Sew light triangles to 
each side of light triangle. Repeat to make four units. 

4. Add one triangle unit to each side of center unit. Finish
by adding remaining red triangles to each corner. 

5. Layer block, batting and back together. Machine or hand 
quilt. Important note - Once your block is quilted trim to 
6-1/2" square. Bind using single thickness binding.
=  =  =  =  =  =  =  =  =
Catch up on all the Patchwork Potholder details here. 

Monday, February 5, 2024

TQC Journal | issue 99


This Months Mini will make a sweet little Valentine and it
 is the perfect project to feature one of your favorite red prints. Add
a pop of pink and a sparkle of blue and this is sure to be another
 keepsake quilt. Grab your 2024 Mini-a-Month Postcard Collection
and get started today.
=  =  =  =  =  =  =  =  =  =  =
Correction | Please cut the borders using your quilt center dimensions. 
The lengths on the postcard are not correct. So sorry. 
=  =  =  =  =  =  =  =  =  =  =
If you would like to stitch along this year you can order the
2024 Mini-a-Month Postcard Collection here.

Patchwork Potholder Project - Block Four
=  =  =  =  =  =  =  =  =
from light print, cut:
20 squares, 1-3/8" x 1-3/8"
from red print, cut:
8 squares, 1-3/8" x 1-3/8"
from brown print, cut: 
8 squares, 1-3/8" x 1-3/8"
from cheddar print, cut:
1 square, 1-1/4" x1-1/4"
from blue print, cut:
4 strips, 1-1/4" x 3-1/8"

Making the block
1. Using 1-3/8" squares make 4 Four Patch blocks.

2. Layout blocks strips and center square in three rows.
Sew the units in each row together. Join the rows
alternating seams at intersections. 

3. Layer block, batting and back together. Machine or hand 
quilt. Important note - Once your block is quilted trim to 
6-1/2" square. Bind using single thickness binding. 
=  =  =  =  =  =  =  =  =
Catch up on all the Patchwork Potholder Project details here

I looked into the TQC Journal Archives and thought you might
like to be reminded about this sweet little Love Letter.
Grab the free pattern and make a few today. Check out some
more free Valentine's Day projects, here, here and here.

Monday, January 29, 2024

TQC Journal | Special Edition


  Patchwork Potholder Project - Block Three
=  =  =  =  =  =  =  =  =
from red print, cut:
1 square, 3-1/2" x 3-1/2"
4 squares, 2-1/8" x 2-1/8"
4 strips 1-1/2" x 4-1/2"
from tan print, cut:
4 squares, 1-1/2" x 1-1/2"
1 square, 3-1/2" x 3-1/2"
4 squares, 2-1/8" x 2-1/8"
Making the block
1. Using 3-1/2" and 2-1/8" red and tan squares make eight
flying geese units. Click here for flying geese tutorial.
Your blocks should measure 1-1/2" x 2-1/2", including
seam allowances. 

2. Layout block as diagrammed and piece units together,

3. Layer block, batting and back together. Machine or hand 
quilt. Important note - Once your block is quilted trim to 
6-1/2" square. Bind using single thickness binding. 
=  =  =  =  =  =  =  =  =
Catch up on all the Patchwork Potholder Project details here. 

Monday, January 15, 2024

TQC Journal | issue 98


I received some wonderful happy mail this week. My advance
yardage of Historical Hennas is here! I am so excited to get 
to work on a couple new projects. I can't wait for you to see
my newest installment in my Woven collection. Follow me on
 Instagram for some sneak peeks of  Woven | Historical Hennas.
 Patchwork Potholder Project - Block Two
=  =  =  =  =  =  =  =  =
from light print #1, cut:
1 strip, 1-1/4" x 2-3/4"
1 strip, 1-1/4" x 3-1/2"
from grey print, cut:
1 strip, 1-1/4" x 4-1/4"
1 strip, 1-1/4" x 5"
from light print #2, cut:
1 strip, 1-1/4" x 5-3/4"
1 strip, 1-1/4" x 6-1/2"
from blue print, cut:
1 square, 2" x 2"
1 strip, 1-1/4" x 3-1/2"
1 strip, 1-1/4" x 4-1/4"
from navy print, cut:
1 strip, 1-1/4" x 2"
1 strip, 1-1/4" x 2-3/4"
1 strip, 1-1/4" x 5"
1 strip, 1-1/4" x 5-3/4"

Making the block
1. Starting with the center 2" blue print square, add the navy 
print 1-1/4" x 2" strip to the left side. Continue add strips
until all pieces have been added. 

2. Layer block, batting and back together. Machine or hand 
quilt. Important note - Once your block is quilted trim to 
6-1/2" square. Bind using single thickness binding. 
=  =  =  =  =  =  =  =  =
Catch up on all the Patchwork Potholder Project details here. 

I am starting a new feature in the TQC Journal. Scrappy Savings
will be posted in the second issue of each month. This is your
chance to grab the pattern for some of my favorite scrappy
projects at a great price, $4.00! All patterns will be instant 
PDF downloads so you can get started right away. 
- - - - - - - - - - - - - 
Summer Stars
Pattern includes several size options
Quilt pictured finishes 51" x 62"


Monday, January 1, 2024

TQC Journal | issue 97

 
Happy New Year!
I cannot think of a better way to ring in the New Year than with
a little stitching. If you already have the 2024 Mini-a-Month
Postcard Collection, pull it out and grab a handful of winter blues
and a pop of red and get started with this simple half-square-triangle quilt.
=  =  =  =  =  =  =  =  =  =  =
If you would like to stitch along this year you can order the
2024 Mini-a-Month Postcard Collection here.
Source - Pat Nickols collection at the Mingei Museum

I have another fun free project planned for us to stitch along
together. I am a bit obsessed with potholder style quilts
at the moment. Potholder quilts are the perfect quilt as you
go project and a great way to practice your hand quilting. 
Here are all the details for this new 2024 stitch along
=  =  =  =  =  =  =  =  =  =  =
Patchwork Potholder Project

Finished Quilt - 32-1/2" x 32-1/2"
Finished Blocks - 6-1/2" x 6-1/2"
11 month project
One block will be posted in each issue of the TQC Journal 
There will not be a printed pattern.

Fabric requirements
Scraps in the colors pictured above
2 yards red print or solid


Lets get started. To complete each block you will
need a few items. After your block is pieced you
will need to hand or machine quilt your block.
I took the time to prep all the necessary items
before I got started. Here is what you will need. 

From flannel or batting, cut: 25 squares, 7" x 7"
(you can find my favorite flannel here)
From backing fabric, cut: 25 squares, 7" x 7"
From red print or solid, cut: 25 strips, 1-1/2" x 42"

Using 1-1/2" strips prepare the single thickness bindings.
Take a look at this video for my tips on finishing a small quilt

Once your block is pieced, prepare it for quilting by 
layering and basting your three layers together.
Once your block is quilted trim to 
6-1/2" square. Bind using single thickness binding. 
Patchwork Potholder Project - Block One
=  =  =  =  =  =  =  =  =
from light print, cut:
5 squares, 1-1/2" x 1-1/2"
12 squares, 2" x 2"
2 rectangles, 1-1/2" x 2-1/2"
1 square, 1-7/8" x 1-7/8" cut diagonally once
from red print, cut:
4 squares, 2" x 2"
1 square, 2-7/8" x 2-7/8" cut diagonally once
from blue print, cut:
8 squares, 2" x 2"

Making the block
1. Using 2" light, blue and red squares make half-square-triangles.
Draw a diagonal line on wrong side of light squares.
Place a marked square on a blue and red square, right sides together.
Sew 1/4" from both sides of the drawn line, cut on line and press.
Trim the half-square-triangle unit to 1-1/2" square

2. Layout block using diagram and piece units together.  

3. Layer block, batting and back together. Machine or hand 
quilt. Important note - Once your block is quilted trim to 
6-1/2" square. Bind using single thickness binding.